Managing form schemas
Form schemas define which system and custom form fields a custom application's list views can display and filter. This guide shows administrators how to create a schema, activate system fields, add fields from custom forms and tune captions, visibility and order.
A form schema is the field catalogue behind a custom application's lists: it declares which fields exist for a given list type, what they are called, and which of them are visible. Views built on top of the schema (see Configuring custom views) can only offer columns and filters that the schema activates. Form schemas combine two field sources in one place:
- System fields — provided automatically by the platform for each list type (name, state, created, reference id, parent folder, …). They are always present in the schema; you activate and rename them, you don't add them.
- Custom form fields — fields from your organisation's custom forms (for example a "Technology Description" field on an installed-technology card). You add these to the schema explicitly.
Form schema management is admin-only and available in Reef only; it replaces the legacy Lagoon FormSettings tool, which supported system fields only.
Creating a schema
- Open the profile menu → Options & Tools → Form Schemas. The list shows existing schemas with their type and whether they are the default for that type. Filter by name, type or default flag.
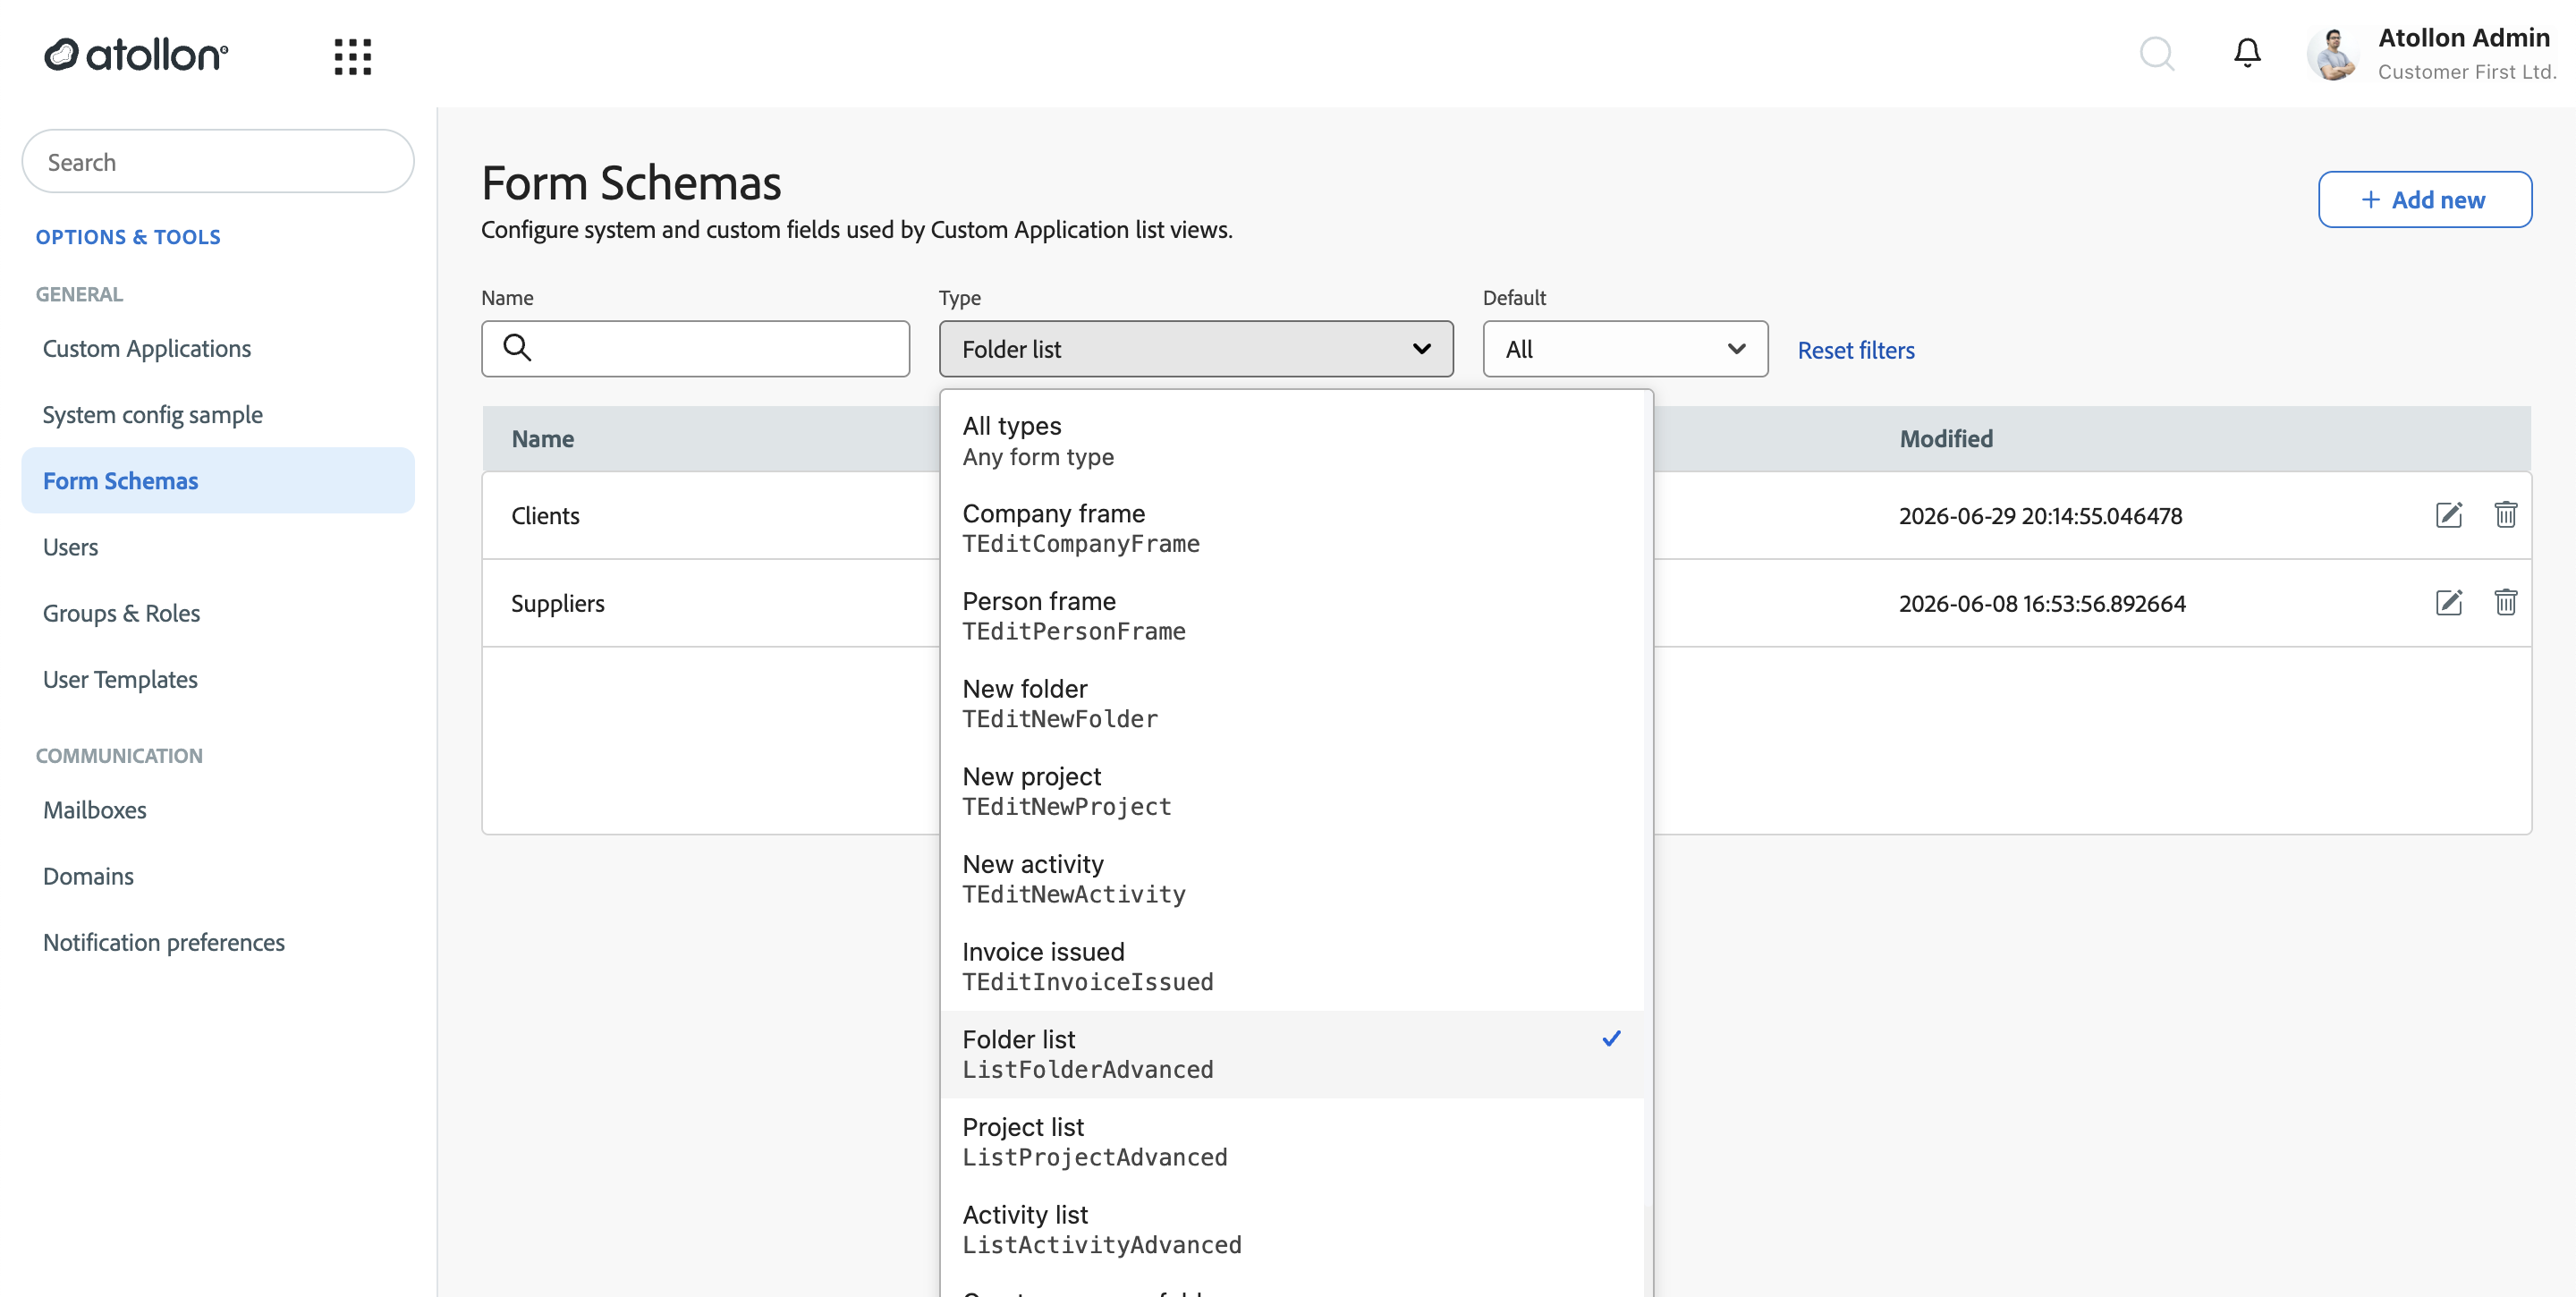
- Select + Add new. Fill in the Name and pick the Form type — the list function or edit frame the schema describes. For custom application lists the relevant types are:
- Folder list —
ListFolderAdvanced. Folder apps (Clients, Suppliers, …). - Project list —
ListProjectAdvanced. Project apps (Deals, Installed Technology, …). - Activity list —
ListActivityAdvanced. Activity apps (Service Activities, Protocols, …).
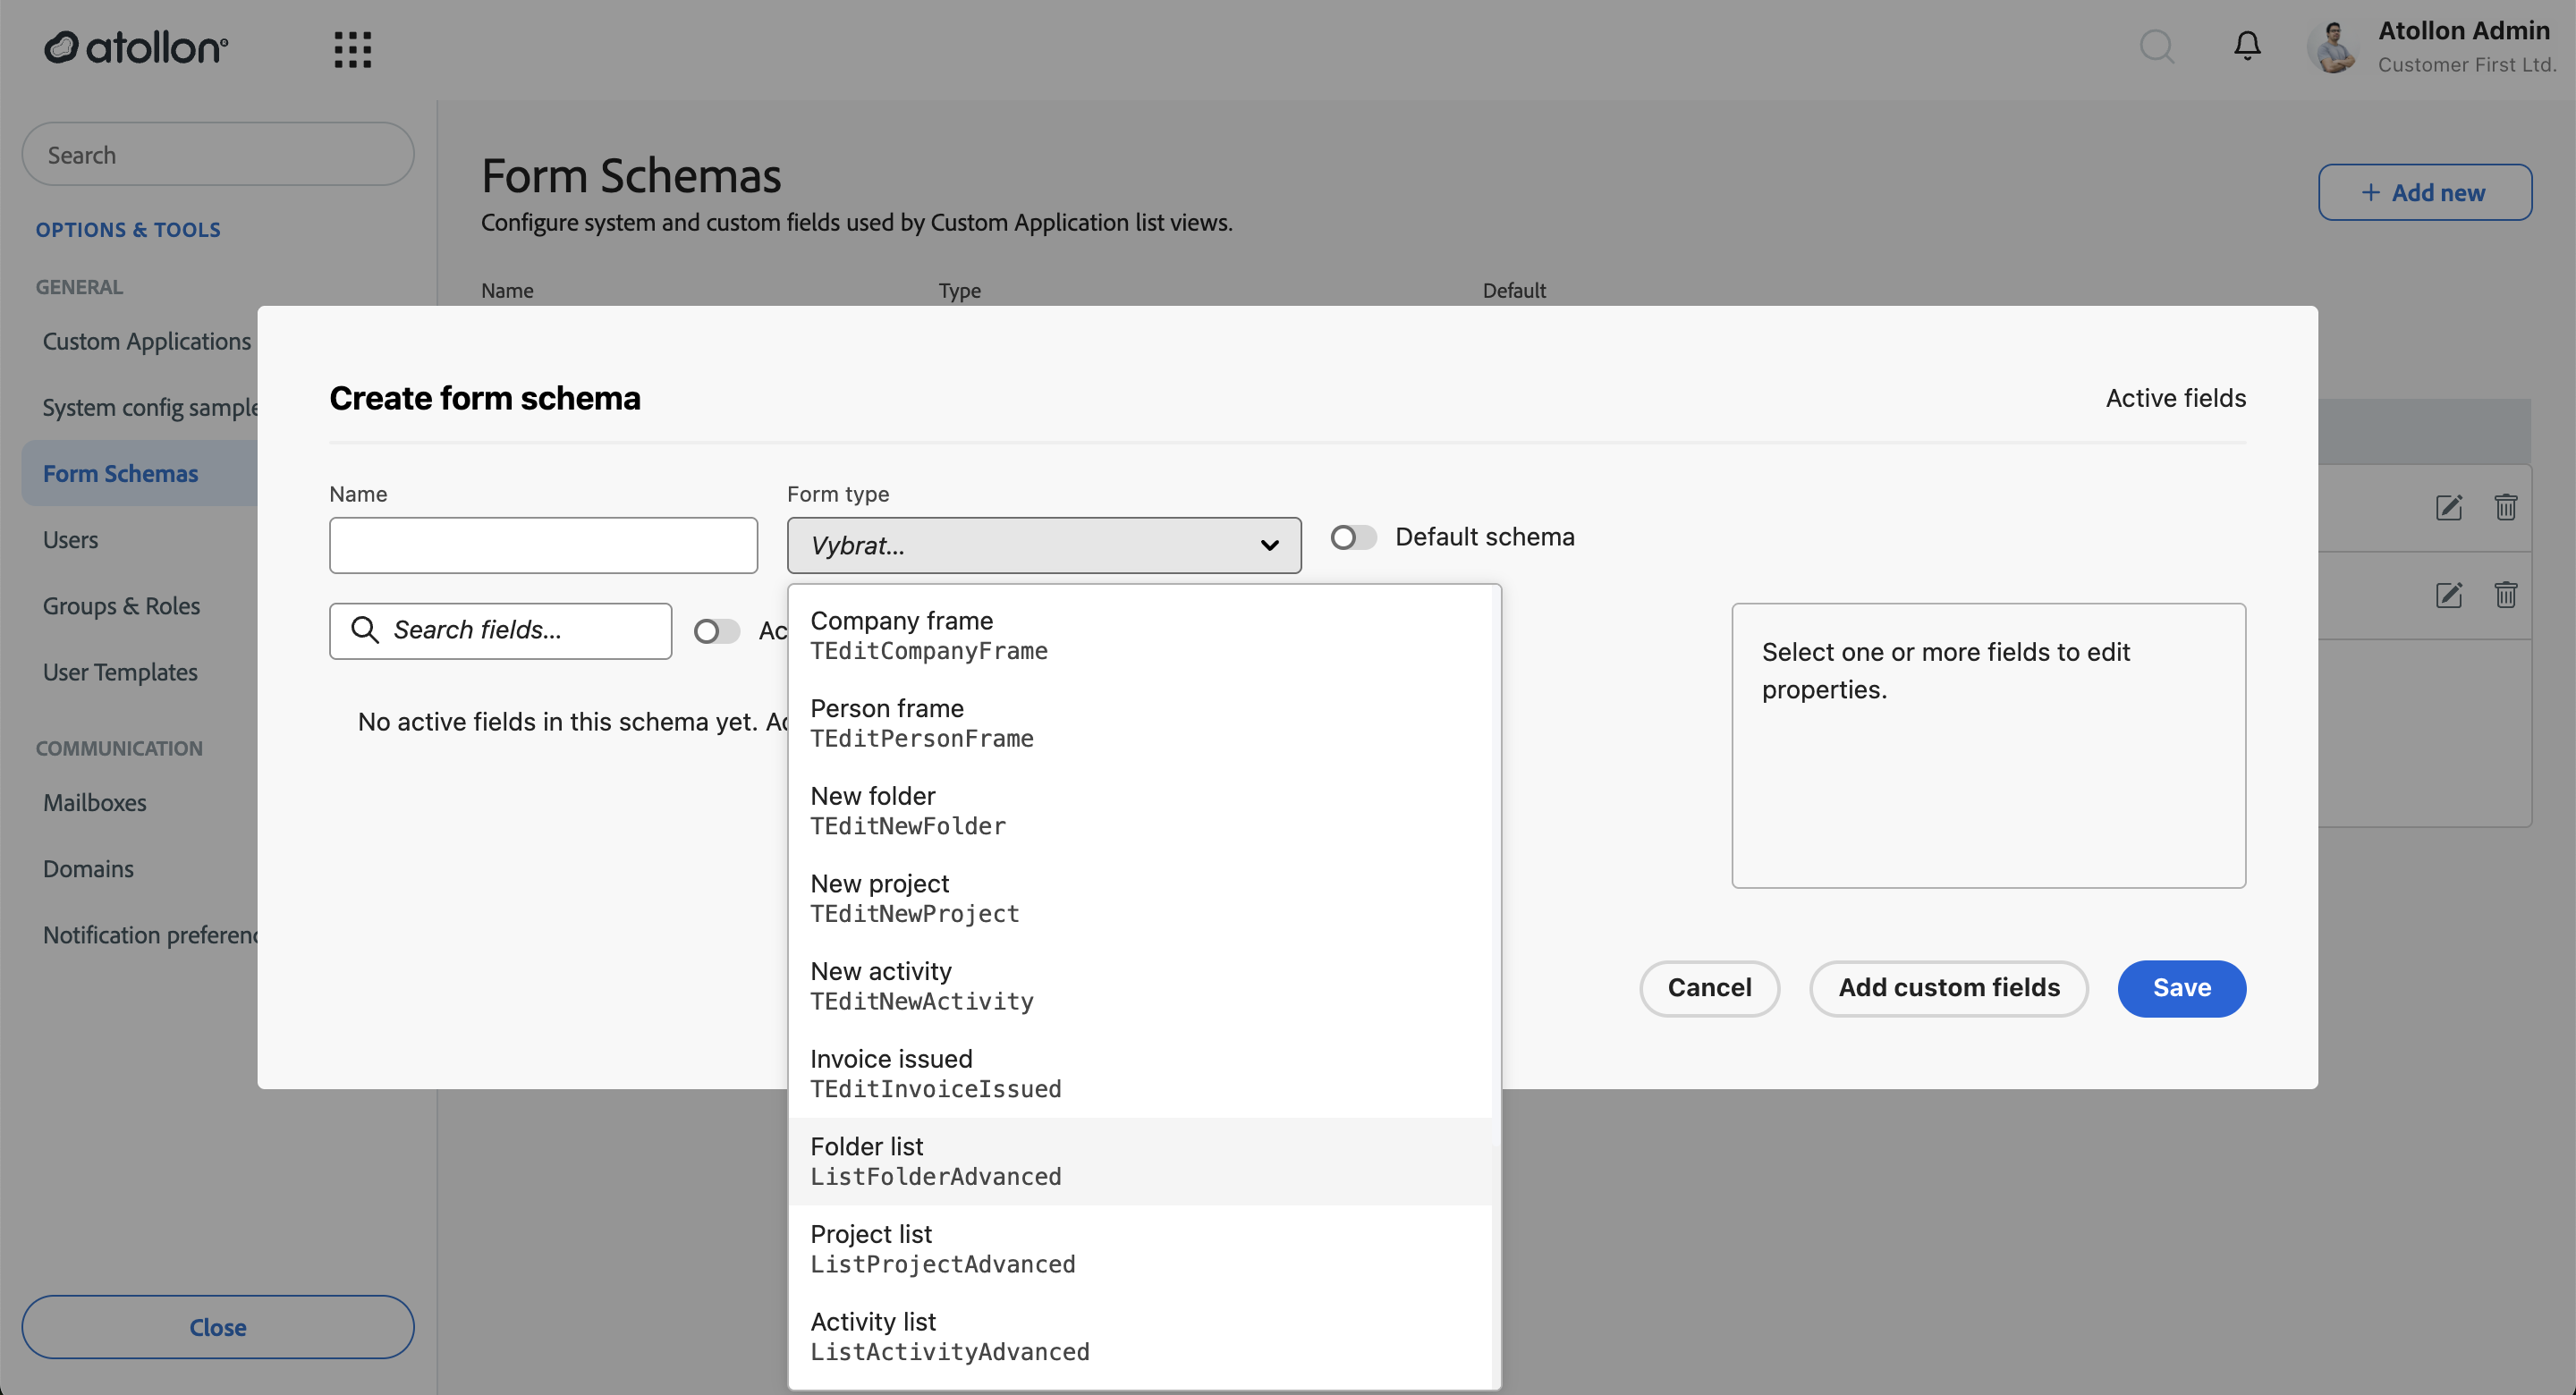
- Optionally switch on Default schema to make this the schema used by apps of this type that don't specify one explicitly.
Activating and tuning fields
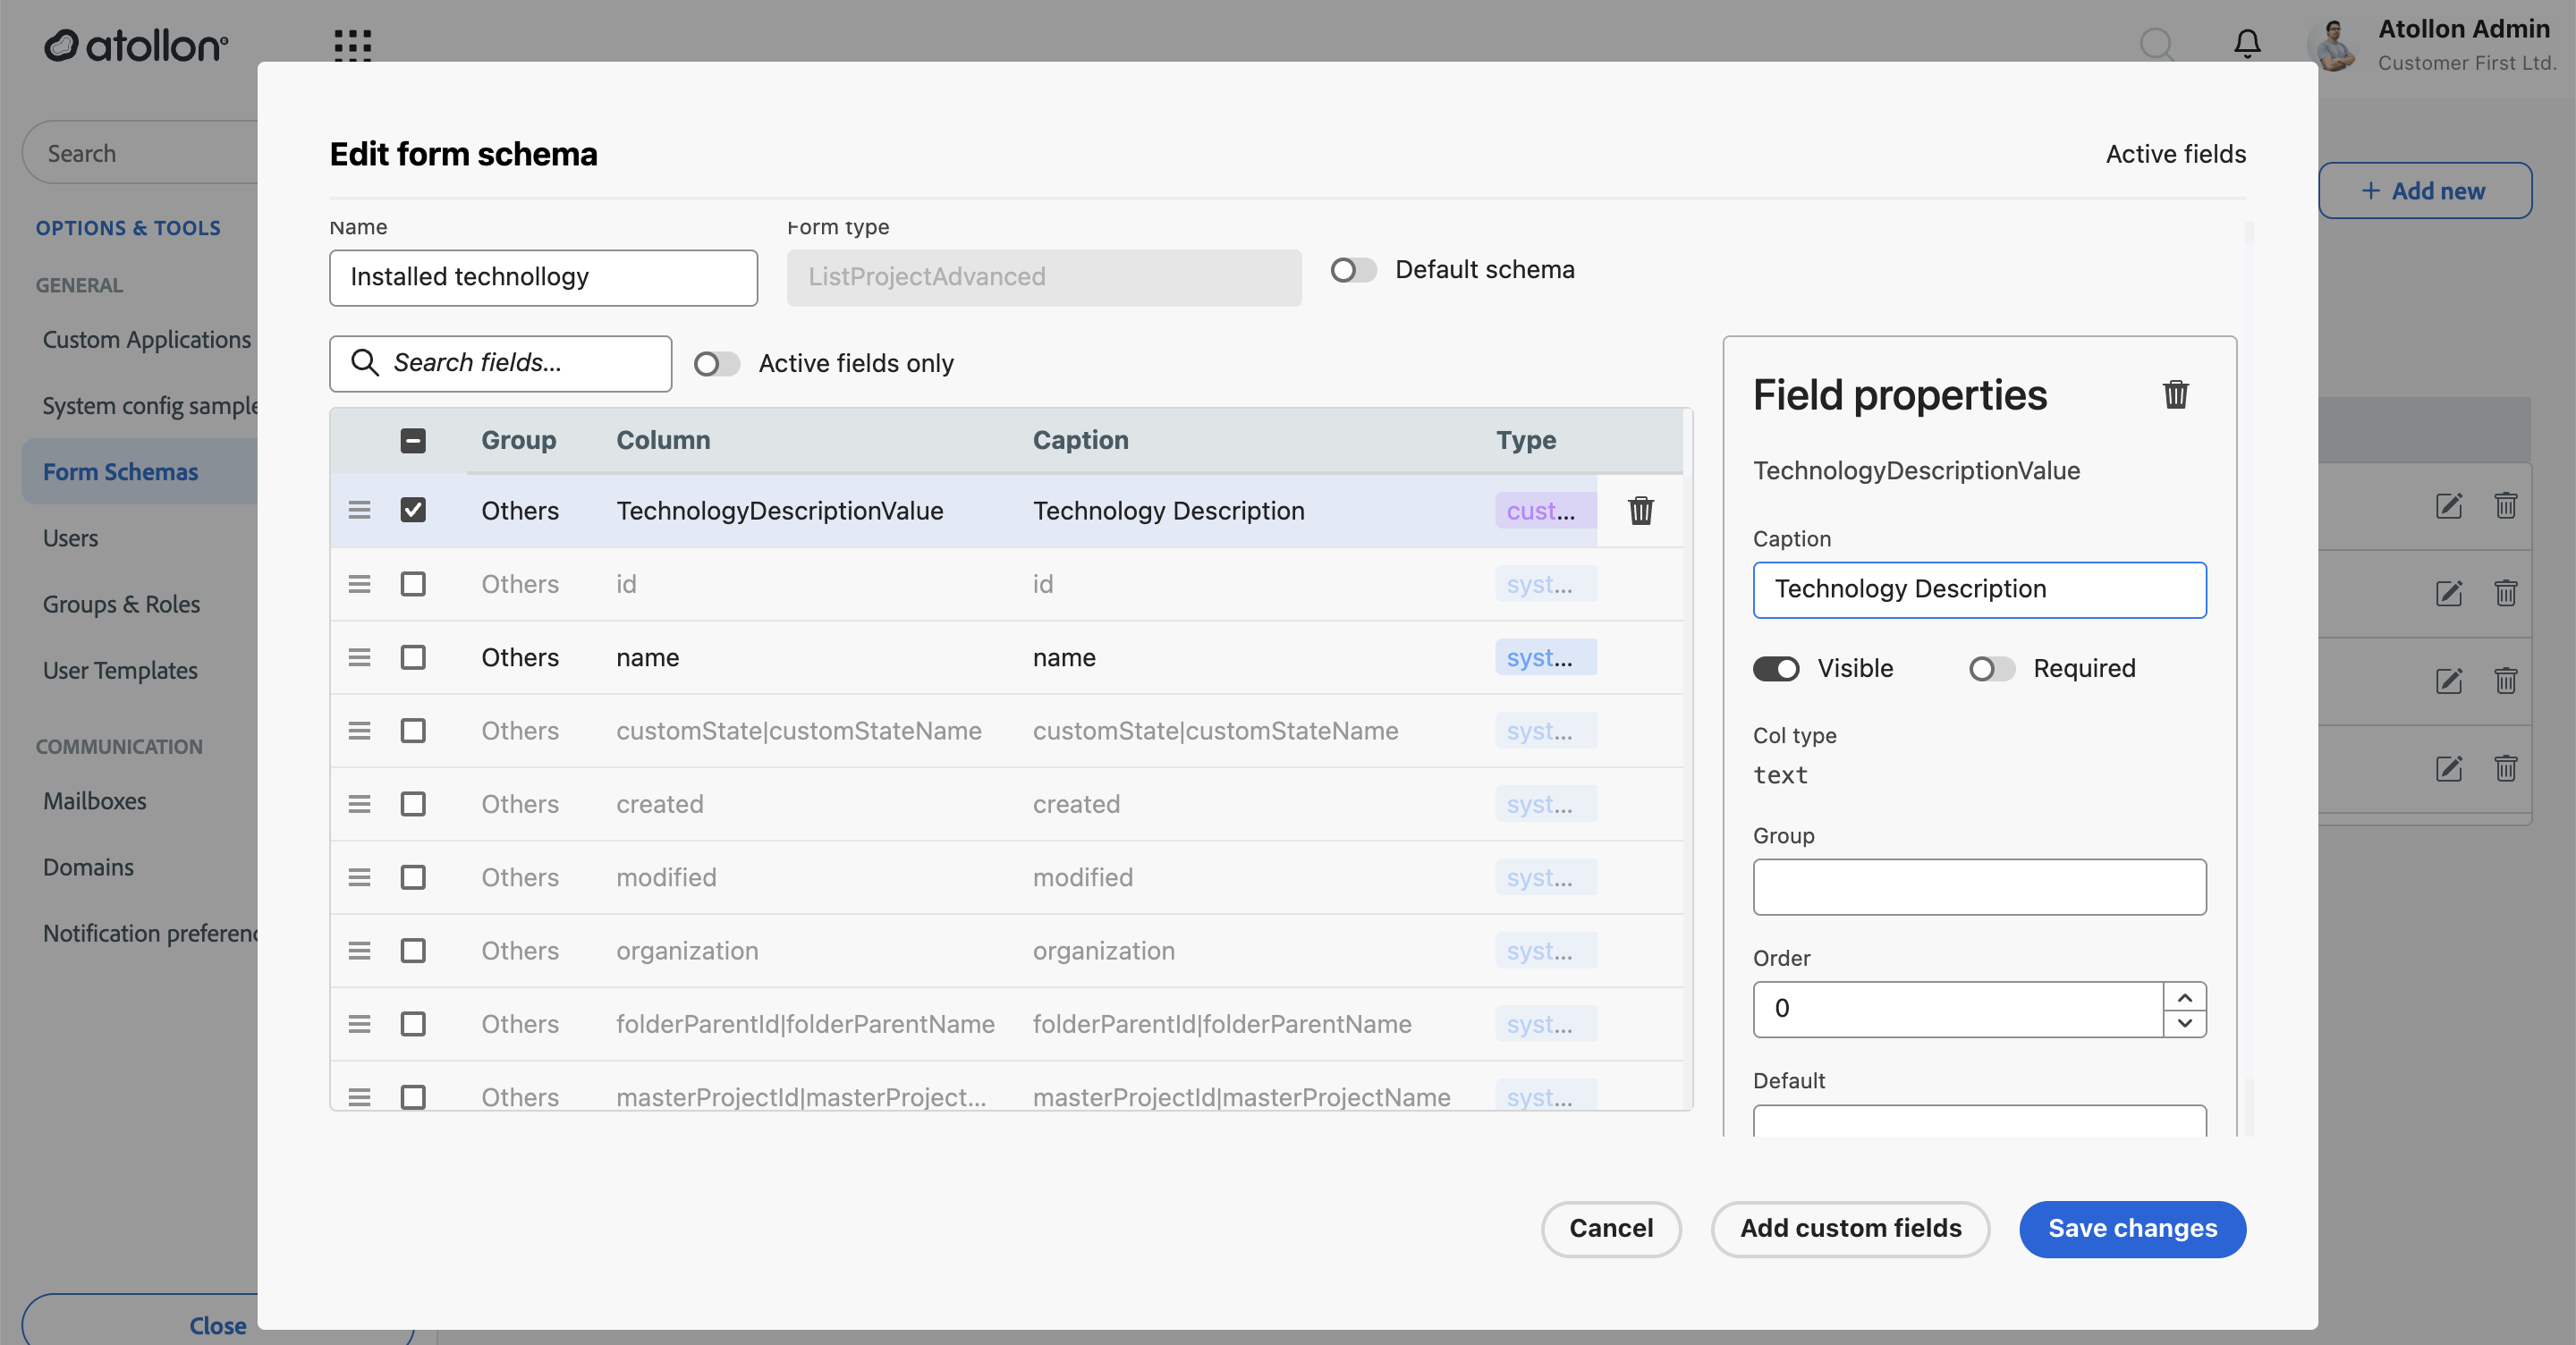
The field grid lists every field with its Group, Column, Caption and Type (system or custom). Check a field to activate it; drag the handle to reorder. Selecting a field opens Field properties:
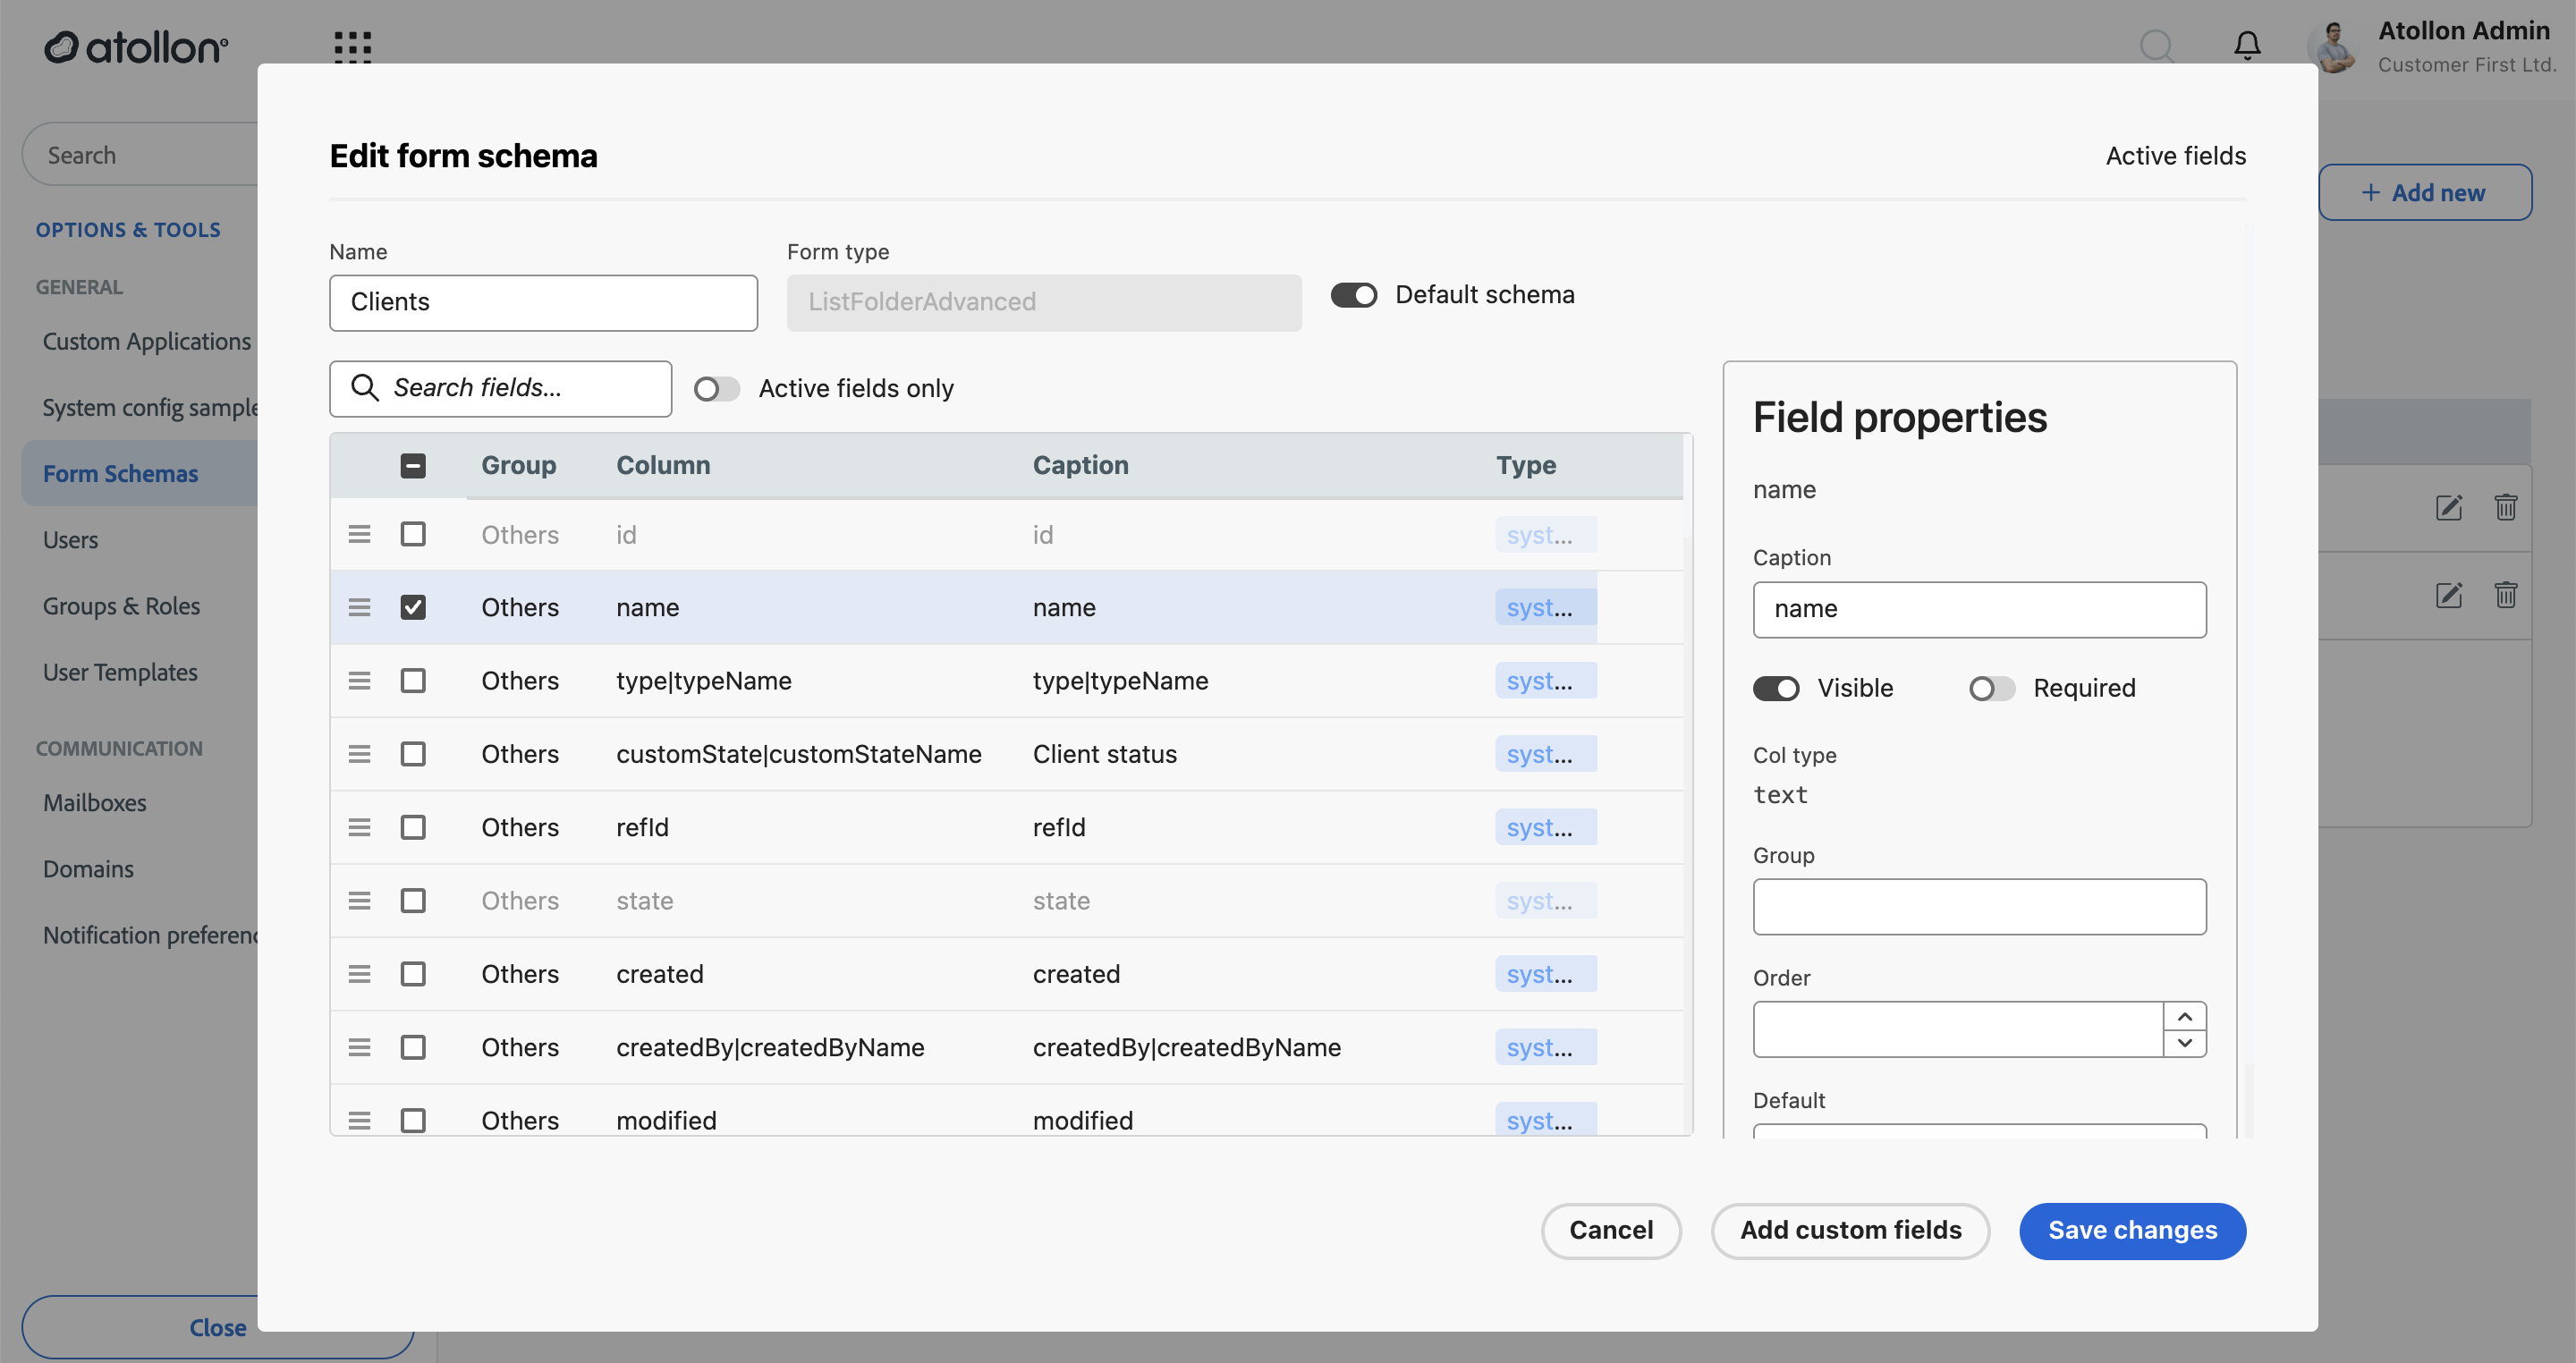
- Caption — the label users see as column header and filter name. Speak the team's language: rename
customState|customStateNameto "Client status" in a Clients schema. - Visible — whether the field shows as a column (fields can also exist only for filtering).
- Required — whether the field is mandatory where editing applies.
- Col type — the normalized data type (
text,number,date, …), provided by the platform. - Group and Order — how fields are grouped and sorted in column and filter pickers.
- Default — a default value, where applicable.
Adding custom form fields
- In the schema editor, select Add custom fields.
- Browse the tree of custom form folders and forms (for example Service → Installed technology card), select a form, and check the fields to include.
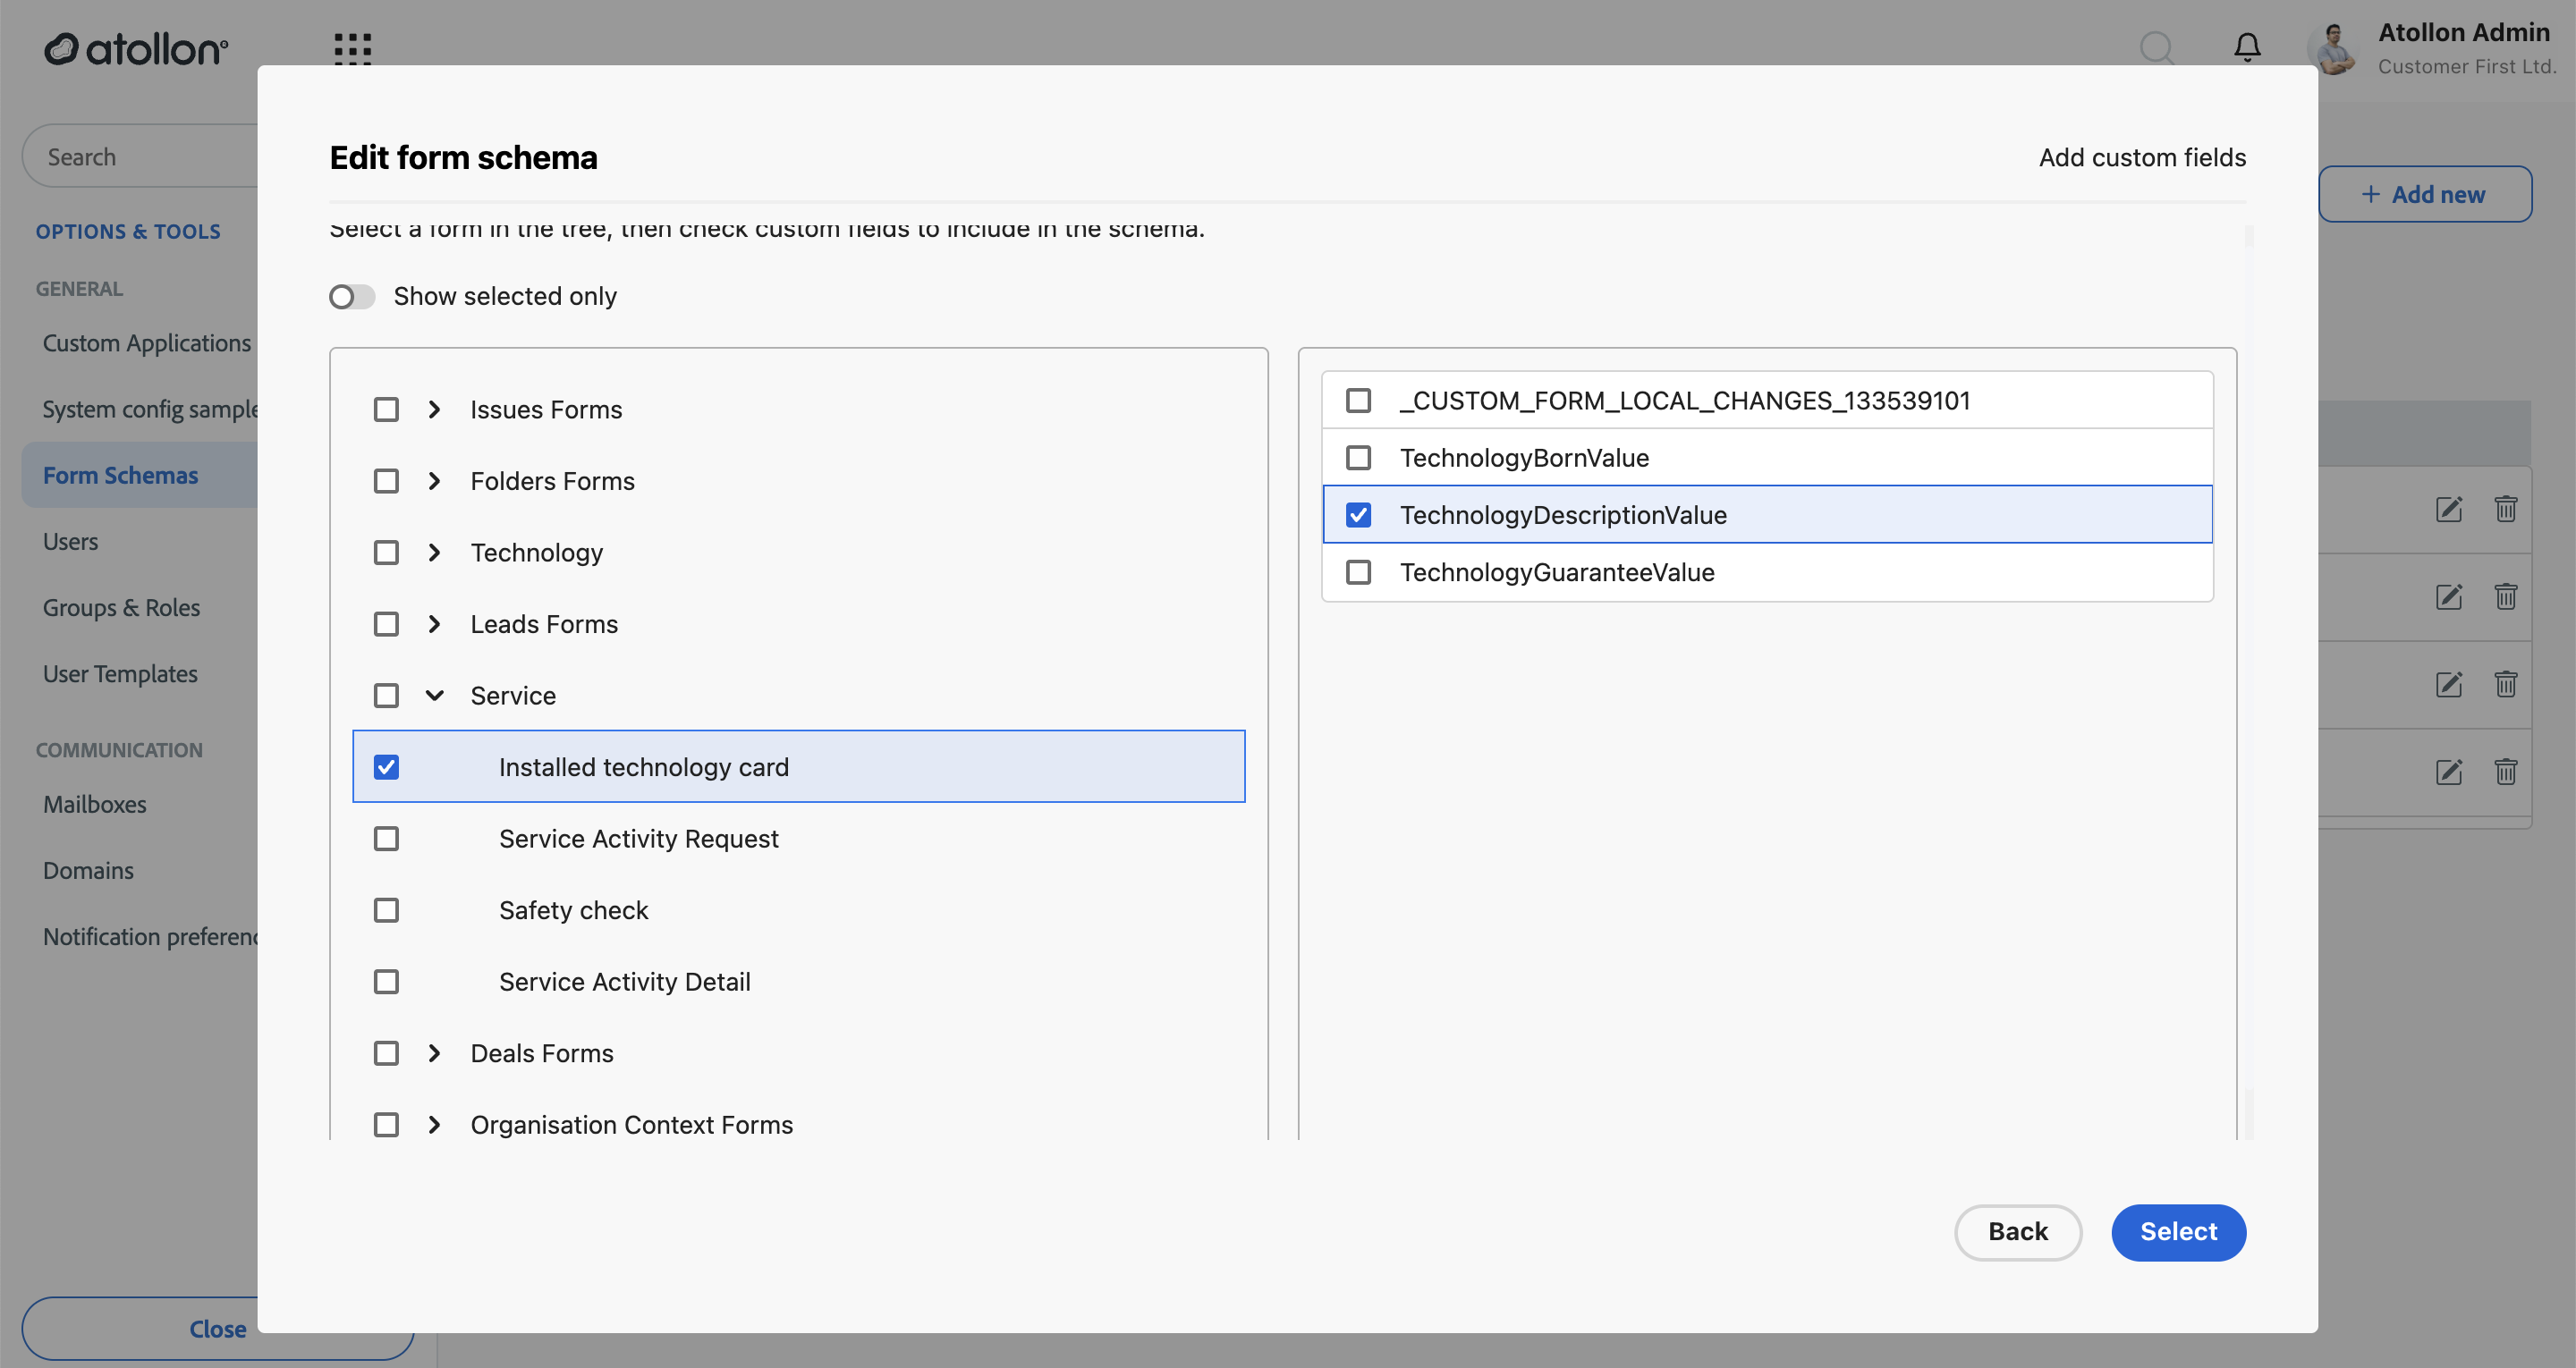
- Select Select. The fields join the grid marked as custom, and take the same properties as system fields — give each a user-friendly caption.
- Save changes. Views using this schema offer the new fields immediately.
Result
The schema's active fields become the available columns and filters for every custom view built on it. There can be more filterable fields than visible columns — activating a field without making it a column is the standard way to enable filter-only fields.
Related
- Configuring custom views — build views on the schema
- Creating a custom application