Tracking your installed devices
July 18, 2026
How to find and manage tracked devices (serials) in Reef: browse the Installed Technology list, filter by manufacturer, supplier, warranty and dates, and open a device to view or change its status, warranty, and installation details.
Device tracking in Atollon lets you follow each physical unit you have sold, installed, or service — such as a specific MRI scanner or probe — as an individual serial. This guide shows how to work with tracked devices in the Reef web client: browsing the device list, filtering it, and opening a device to see or update its details. If the fields described here are not visible in your workspace, ask your administrator to enable them (see Setting up serialized device tracking).
Browsing the device list
Tracked devices appear in a project list — in most workspaces the Installed Technology app. Each row is a device, showing at least its Client (the owner) and Name, plus any serial columns your view is configured to display.
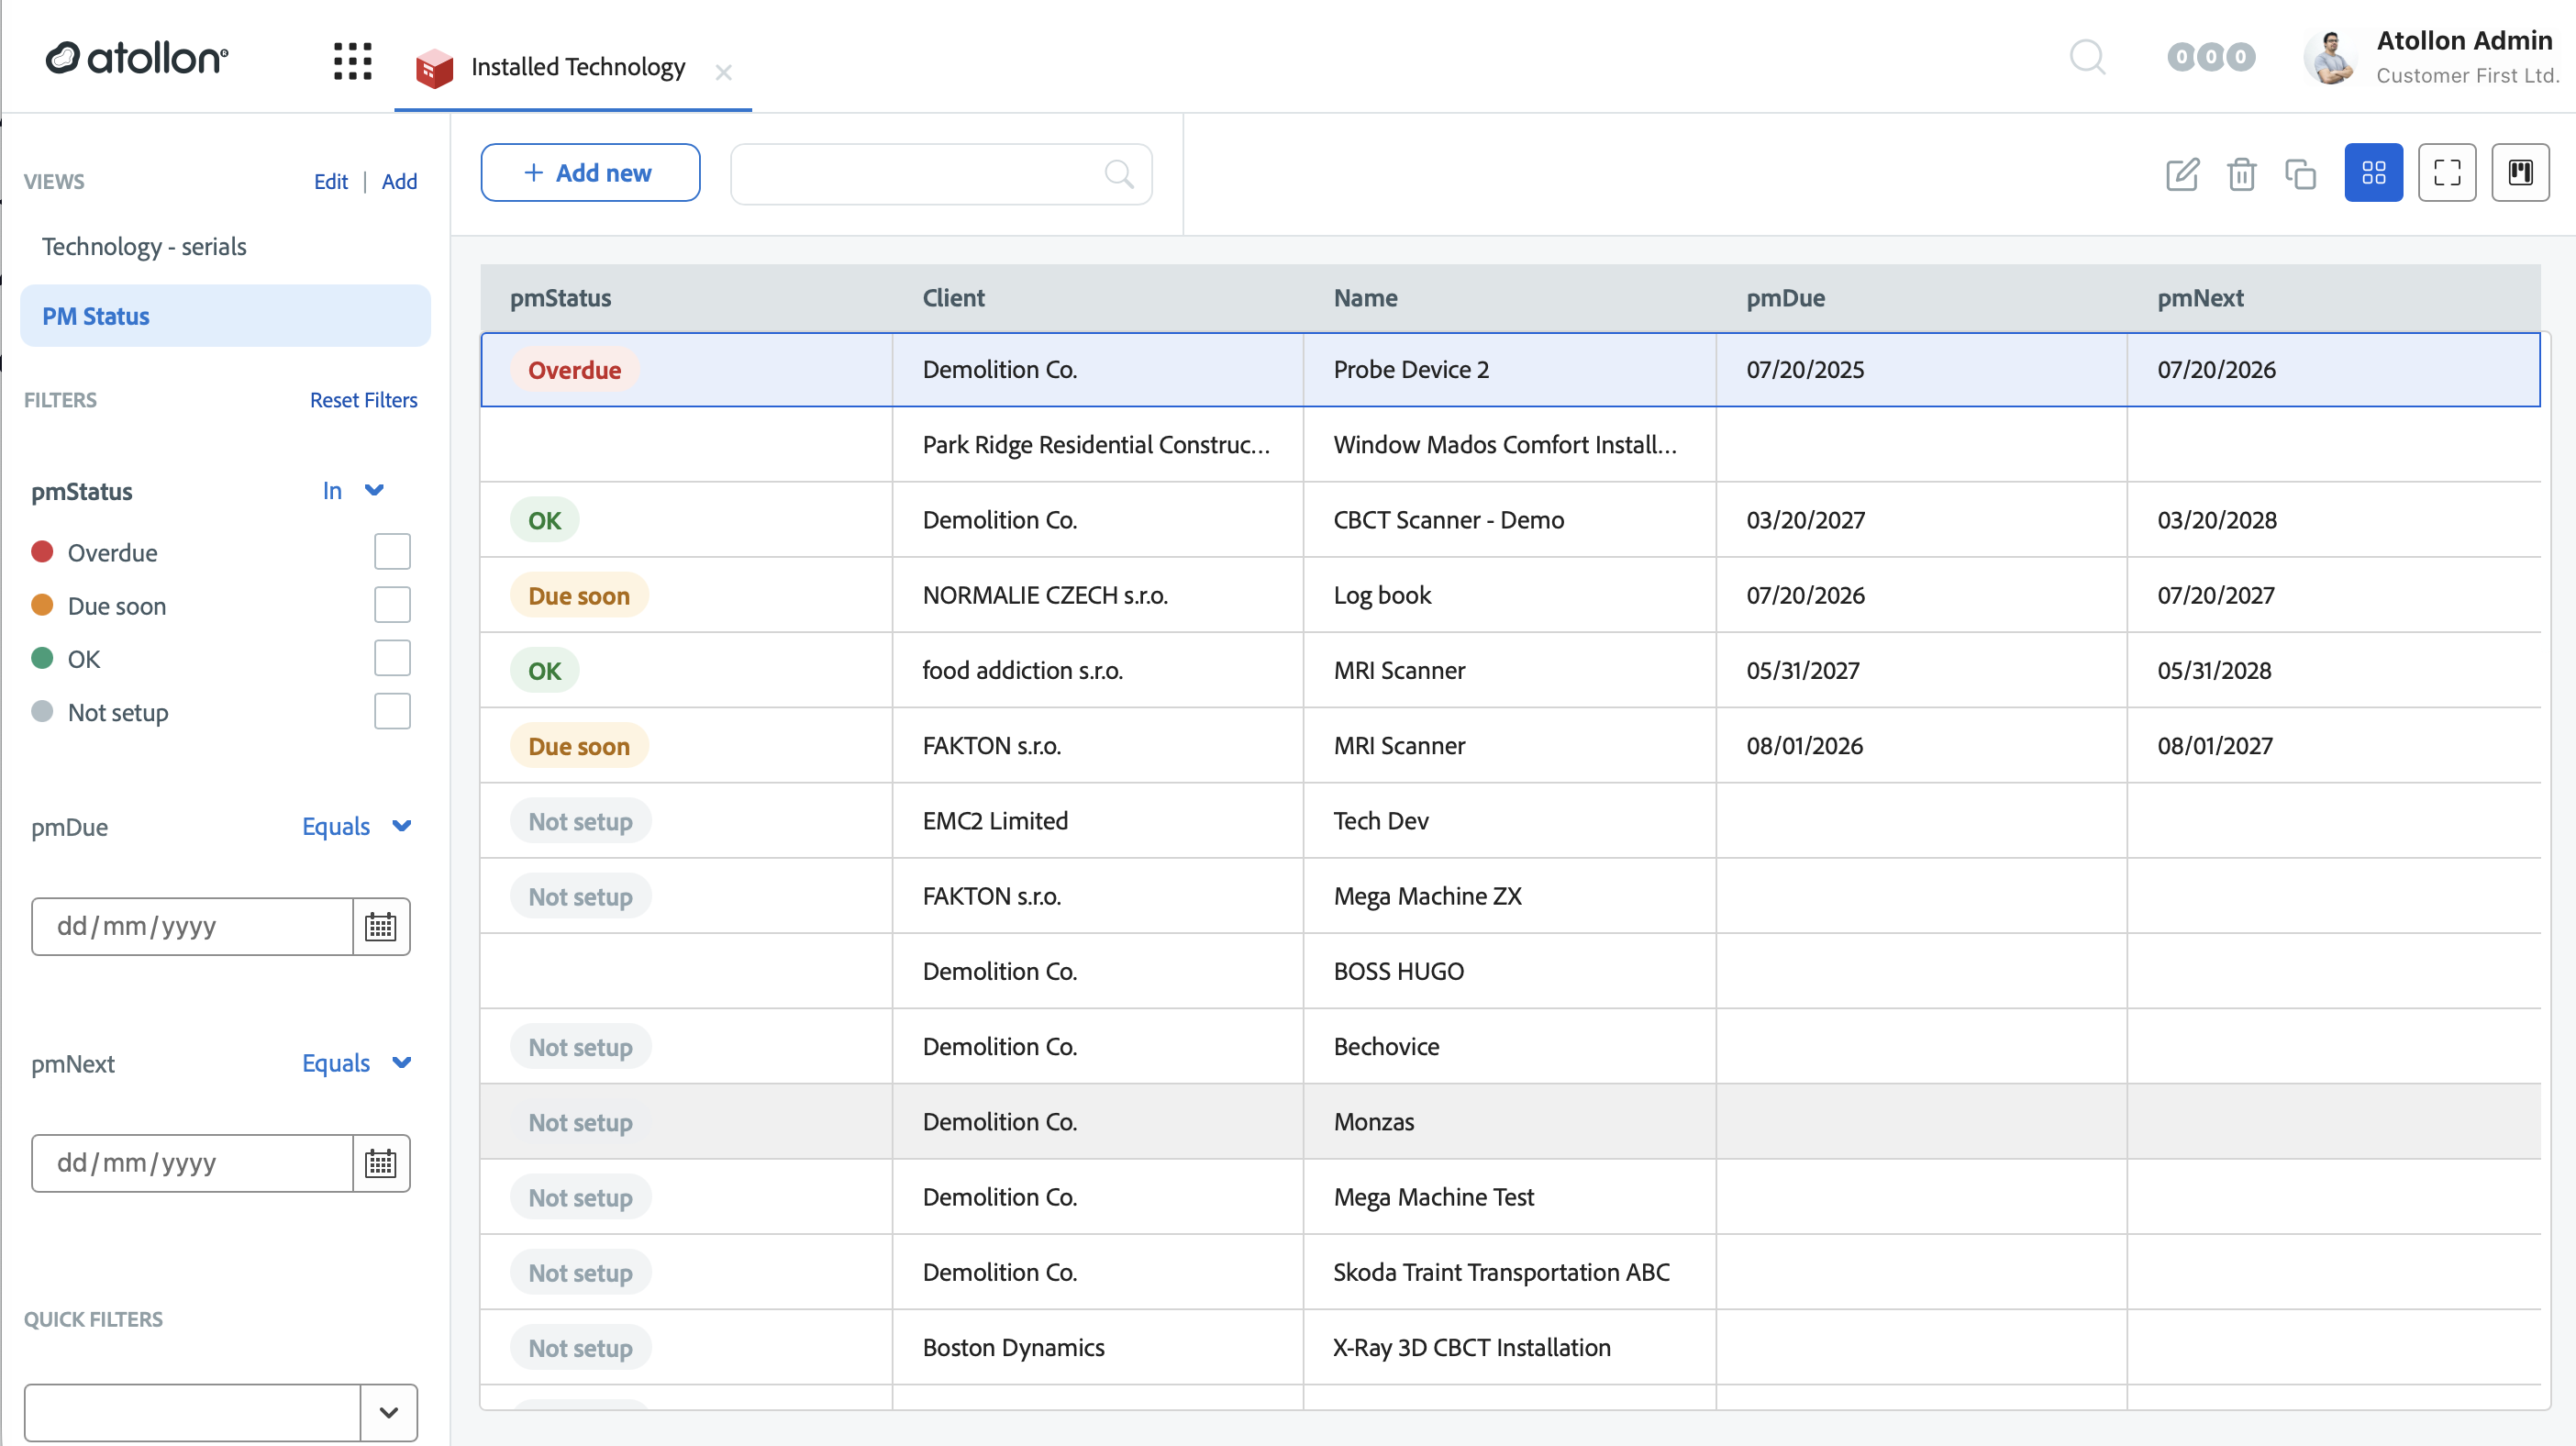
The Views menu on the left lets you switch between saved layouts of the same list — for example a plain serials view and a PM Status view. Switching a view changes which columns and filters are shown without changing the underlying data.
Filtering the device list
The filter panel on the left narrows the list to the devices you care about. All filtering happens on the server, so even large device populations stay fast.
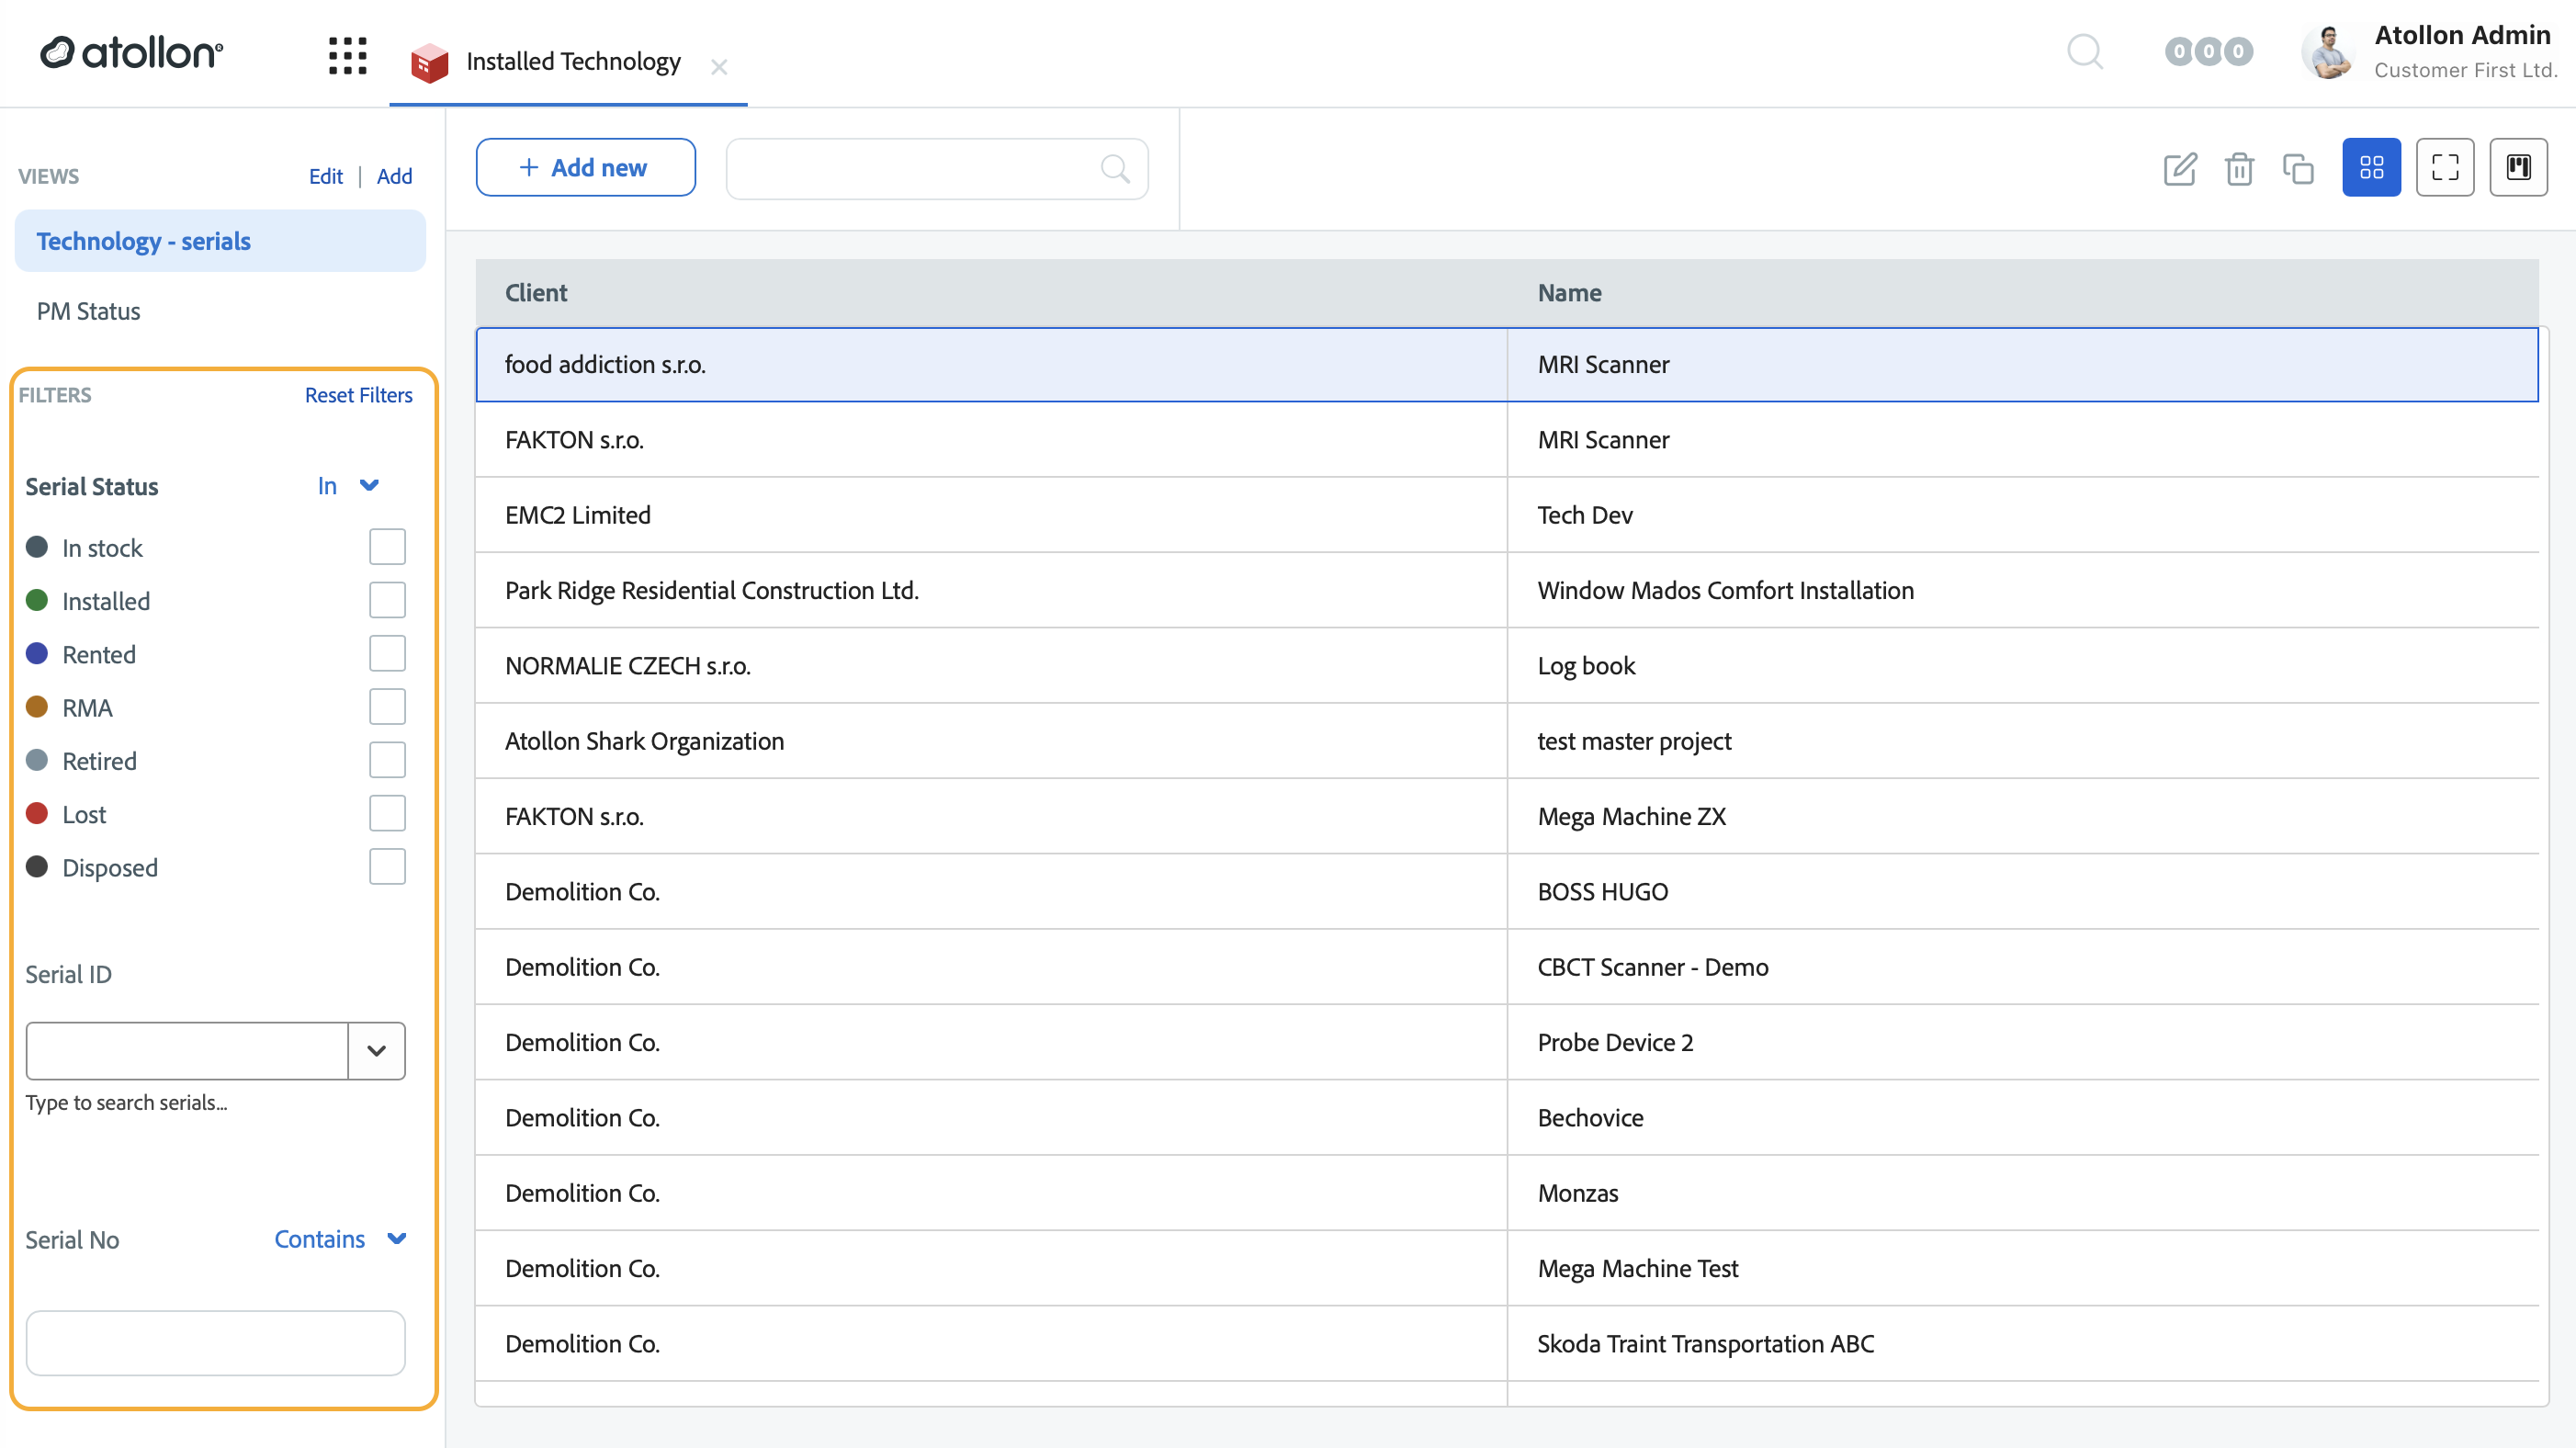
Common filters include:
- Serial No — search by serial number (contains match).
- Mfg Date, Warranty Start, Warranty End — date filters, useful for a warranty review (for example, devices whose warranty ends in the next 90 days).
- Supplier Id — show only devices that came from a particular supplier.
- Serial ID — pick a specific serial directly.
Use Reset Filters to clear the panel and return to the full list. Which filter fields appear depends on your view configuration; your administrator controls the available set.
Opening a device
Click a device row to open its detail. From here you can see and edit the attributes Atollon tracks for that unit.
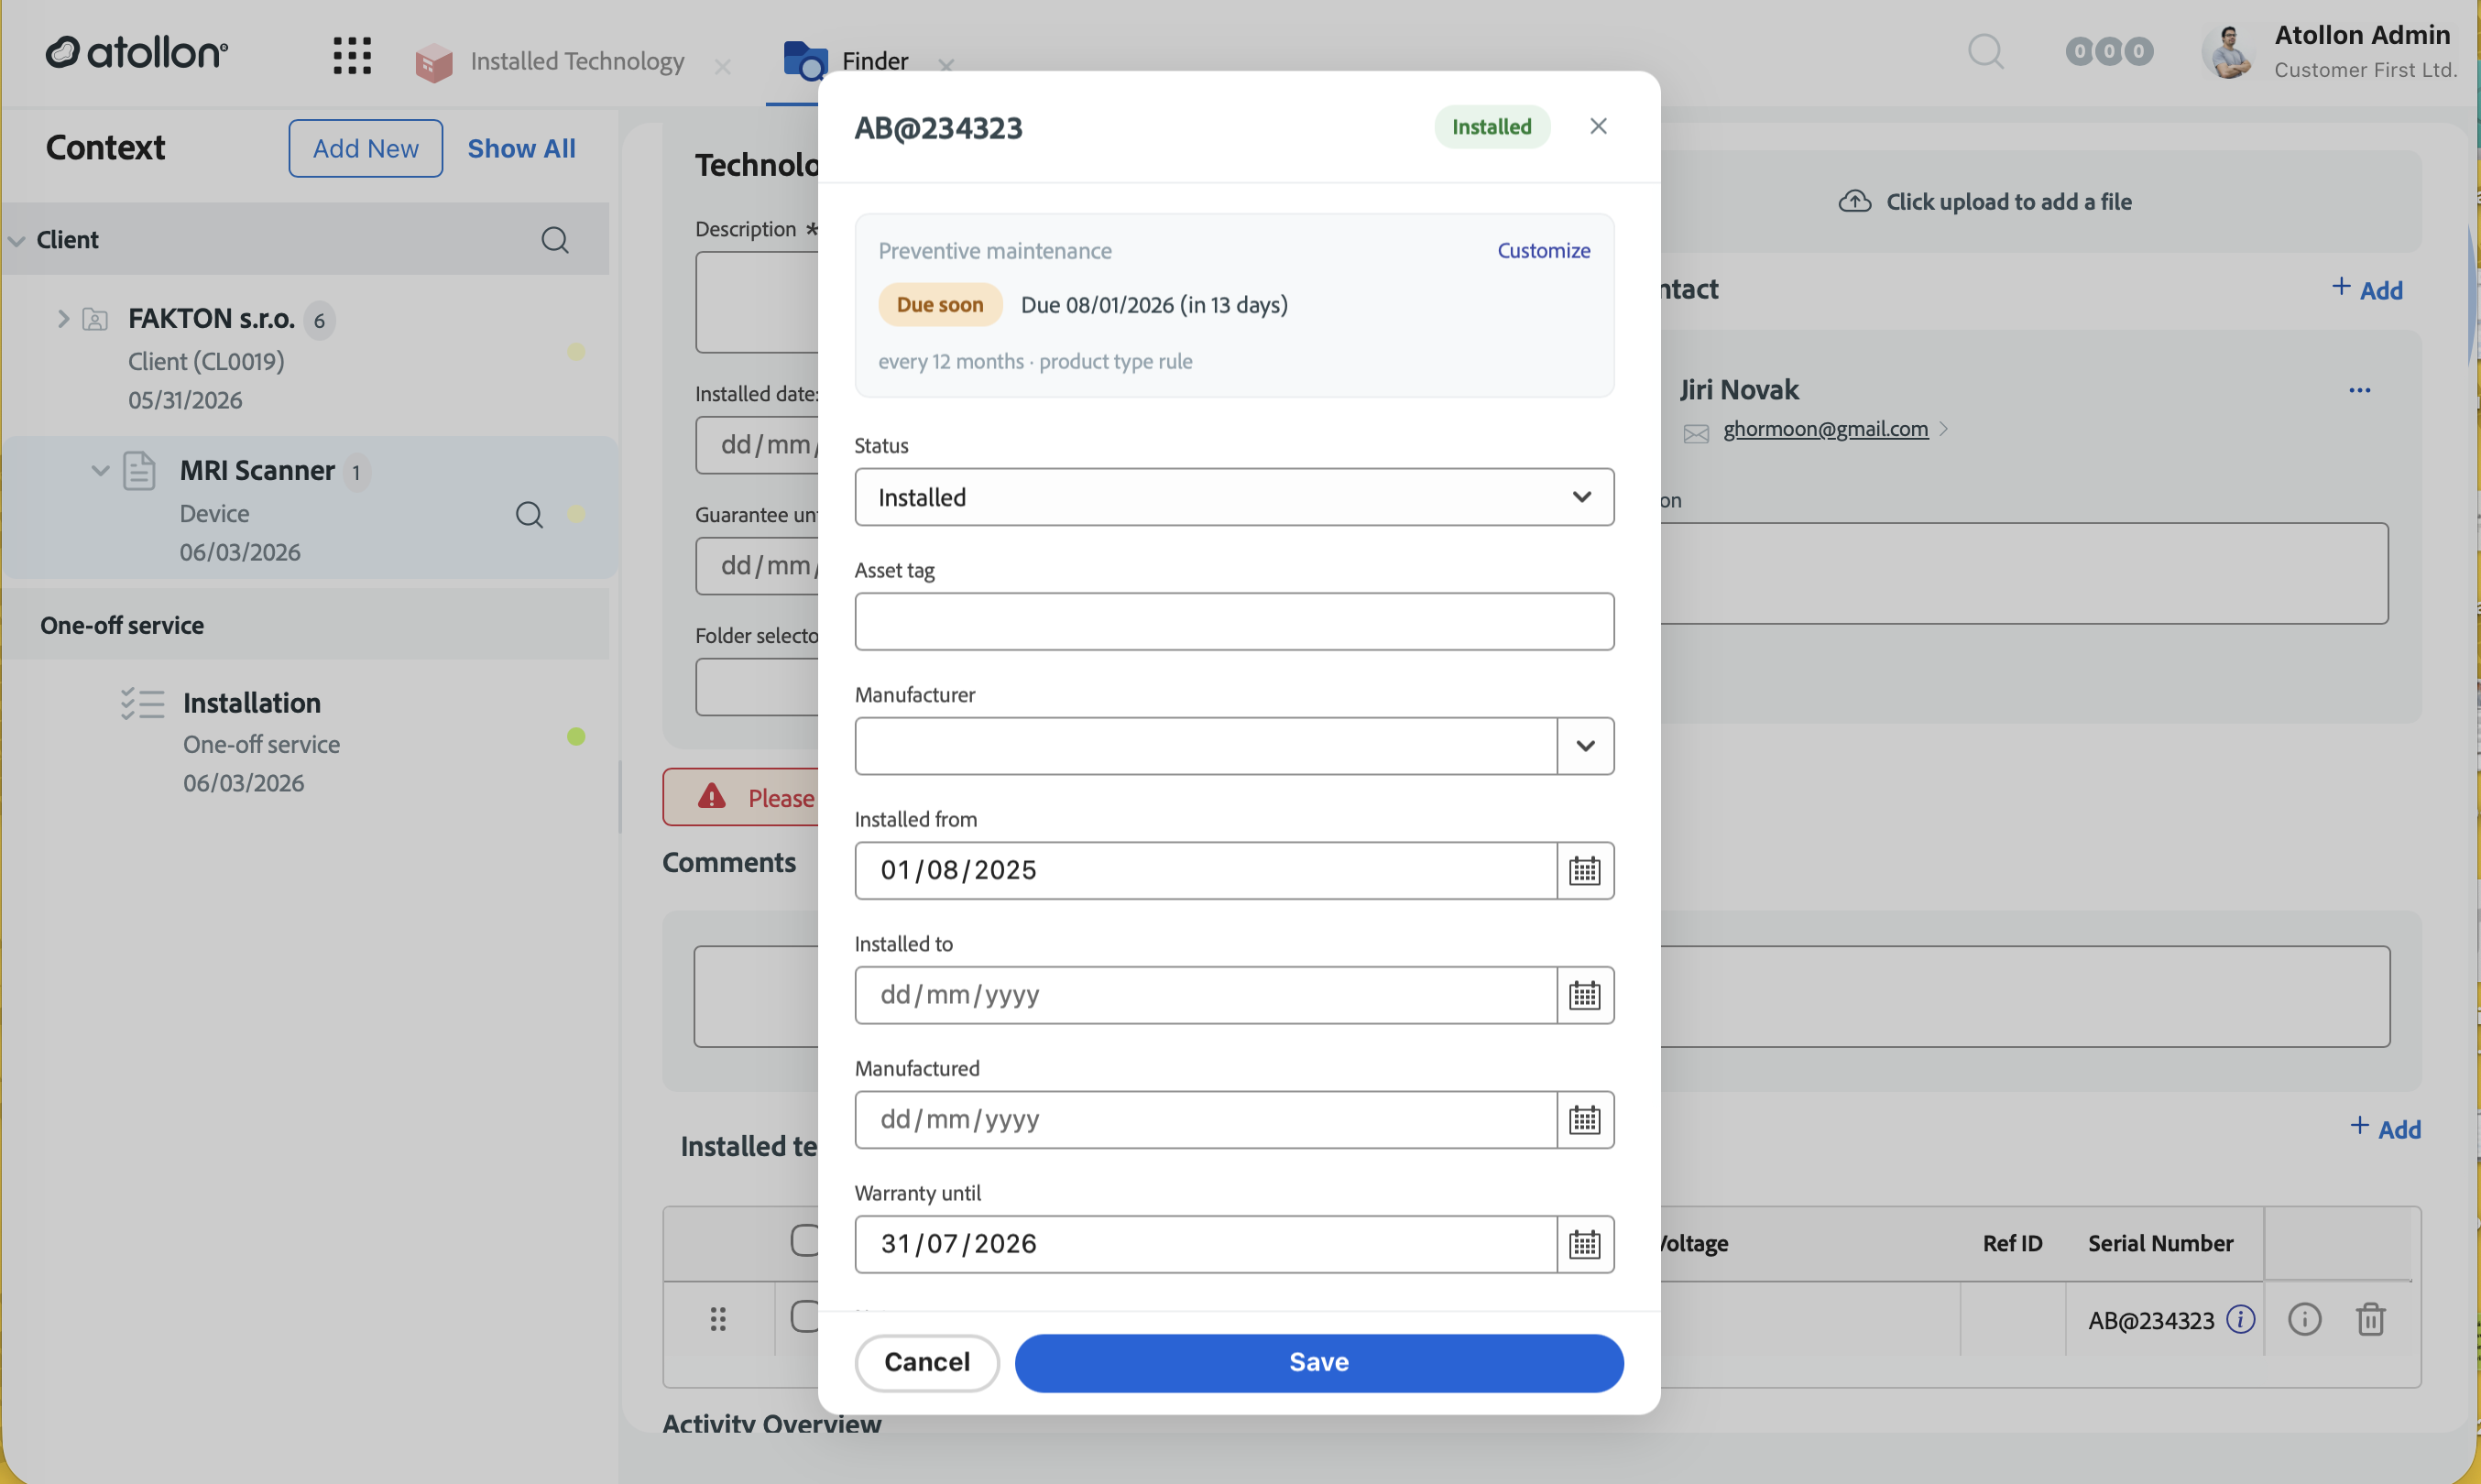
The detail includes:
- Status — the device's lifecycle state (see below).
- Asset tag — your internal inventory tag.
- Manufacturer — the make of the device.
- Installed from / Installed to — the current installation period.
- Manufactured — the manufacture date.
- Warranty until — the warranty end date.
A Preventive maintenance card at the top of the detail shows the device's service status when a maintenance rule applies — this is covered in Monitoring preventive maintenance. Make your changes and click Save.
Device statuses
The Status field records where a device is in its lifecycle. Setting it accurately keeps the list trustworthy and drives reporting.
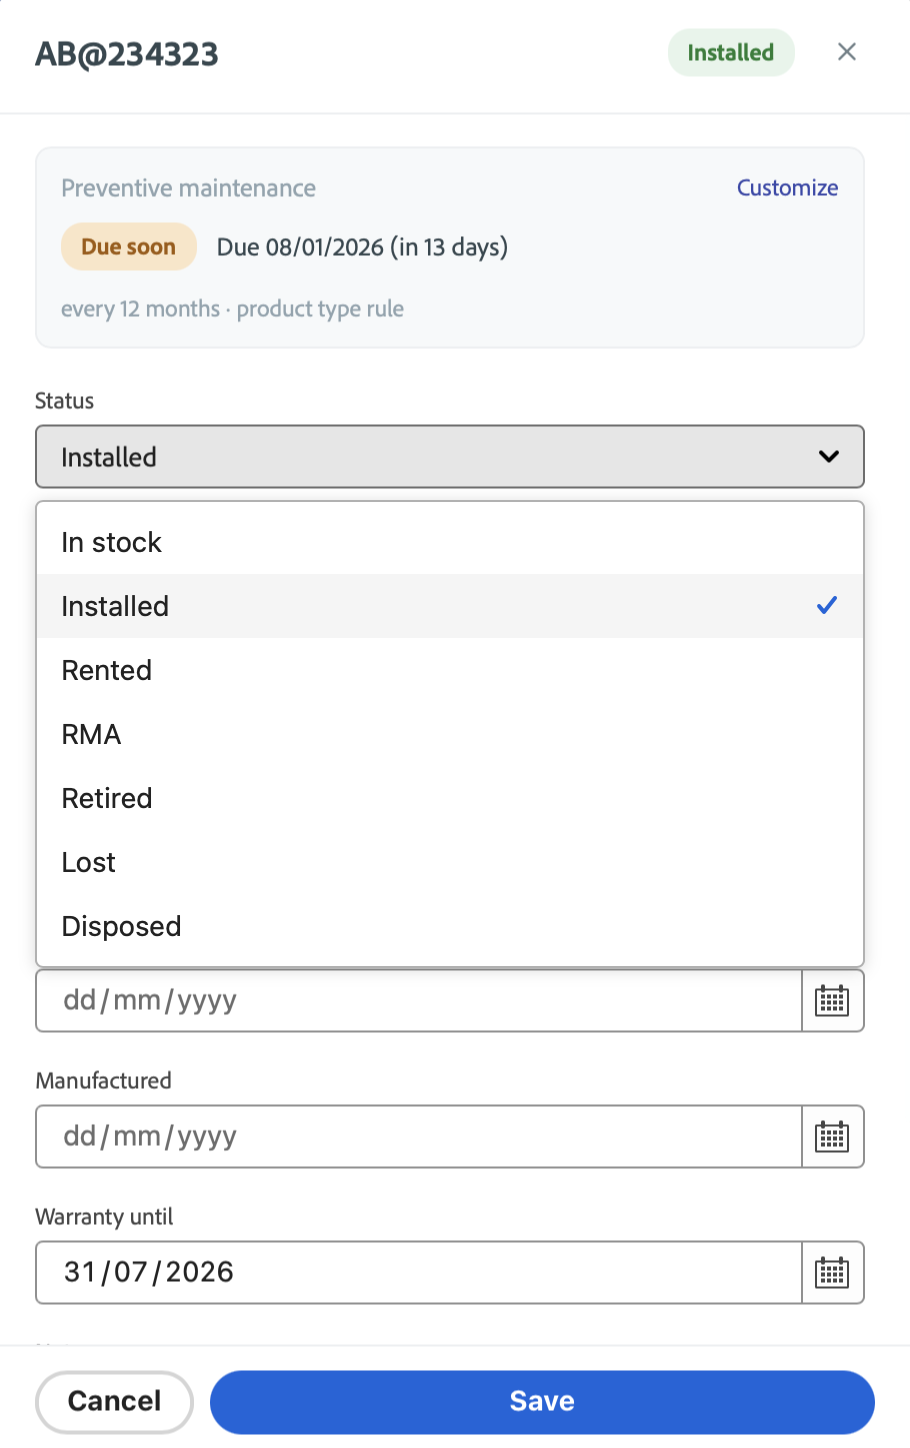
The available statuses are:
- In stock — held in inventory, not yet deployed.
- Installed — currently installed and in use at a customer.
- Rented — out on rental.
- RMA — returned to the manufacturer or supplier for repair or replacement.
- Retired — taken out of active service.
- Lost — unaccounted for.
- Disposed — scrapped or otherwise permanently removed.
Only devices that are currently owned under an active project appear in the preventive-maintenance views, so keeping status and installation dates current ensures maintenance signals stay accurate.
Related guides
- Monitoring preventive maintenance — read PM status, due dates, and overdue signals for your devices.
- Setting up serialized device tracking — for administrators enabling device tracking and choosing which serial fields appear.